Publish Quickstart Guide
Learn the basics of Publish and get up to speed as soon as possible.
Step 1 - Create a post and import your images
For each new blog post, create a new project from the Projects screen.
Now click Add folder, find your folder of images in Finder and click 'Open'.
Your images will now import into Publish.


Step 2 - Adding images to your post
You can now start building your post! You can either click an image, drag an image or add multiple at the same time.
Click to add:
Click any image in the gallery panel on the left to add images to the next available spot in the layout.
Drag to add:
Drag an image from the gallery panel below, above beside, or on top of another image to add it into the layout.
Multiple images at once:
To add multiple images at once, click the Magic Wand button in the toolbar. This will add the selected number of images to the layout in a pattern.


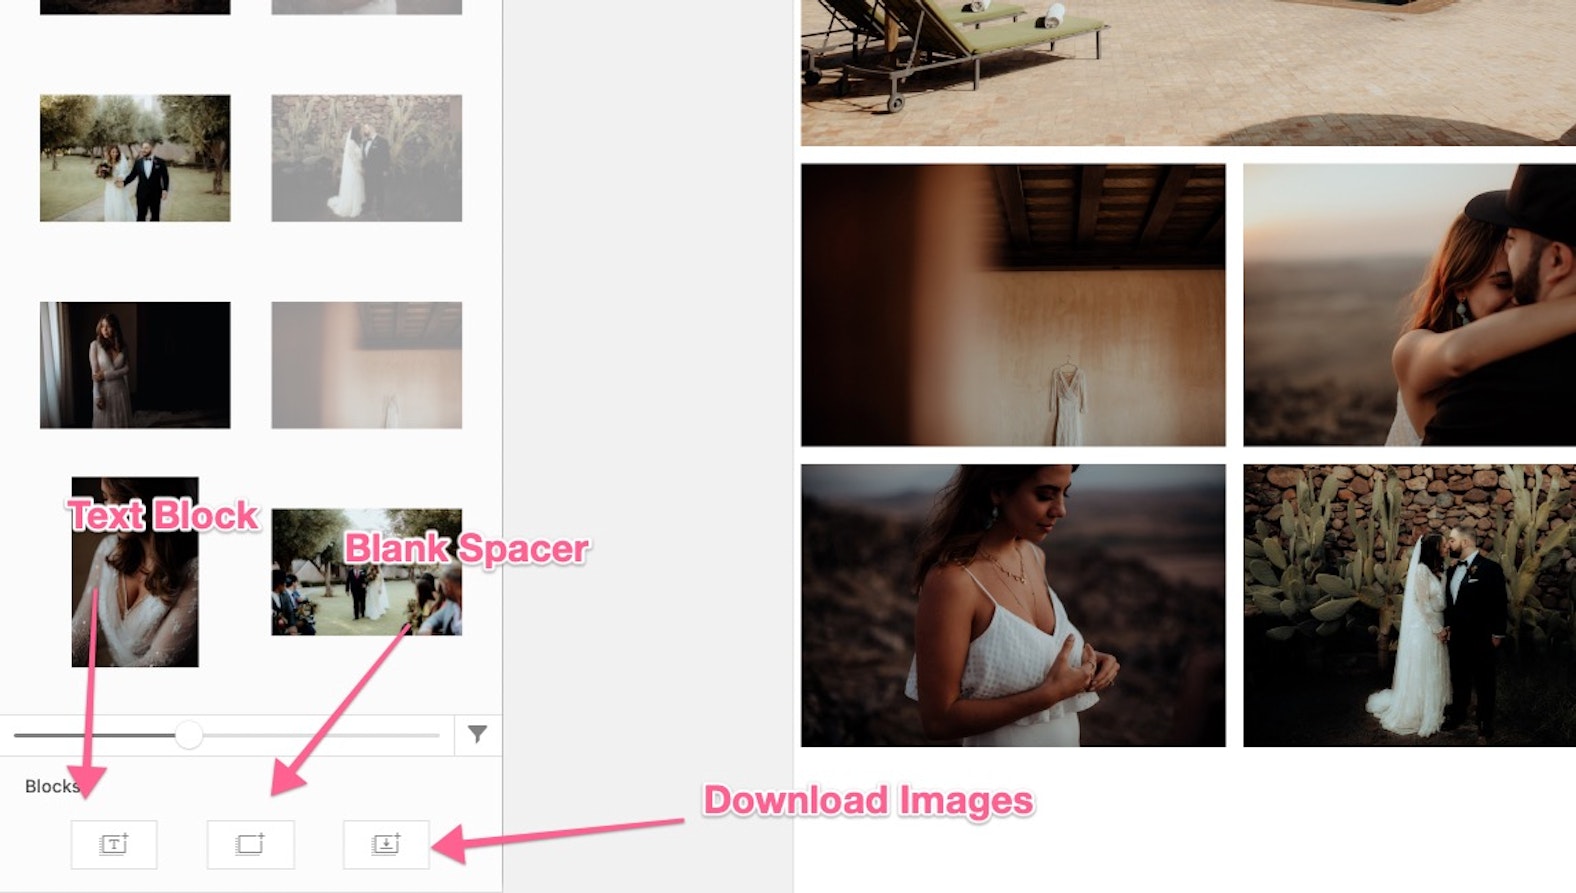
Step 3 - Add different blocks
There is also Text Blocks, Blank Blocks and Download Blocks that can be added to help build your block.
Text block:
These are the leftmost block in the bottom left. After being added to your blog you can edit the text and set the styling. This will take on your website's font once you publish your post.
Blank Spacer Block:
This block will help you make your layout interesting, drag it in, and adjust the size of your block.
Download Images Block:
Add this block to your post so that viewers can download the images once you Publish your blog.

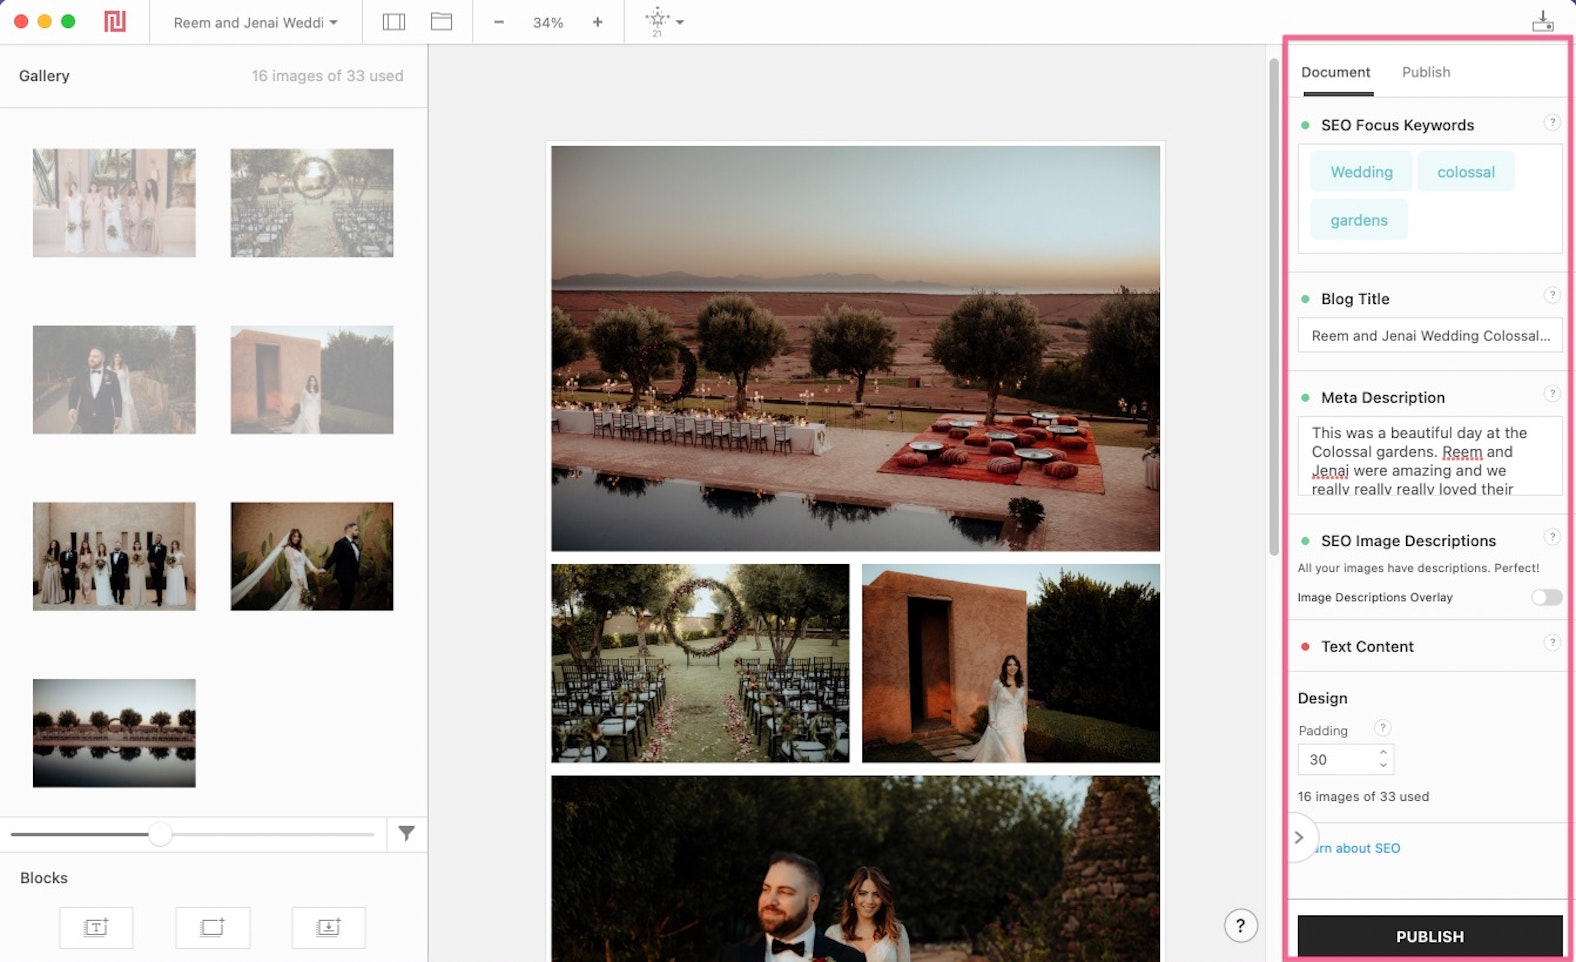
Step 4 - Documents panel
Once you have added 5 images or opened the documents panel you can start doing the SEO for your post.
We will cover this briefly here, but here is some more detail on getting great SEO.
SEO Focus Keywords:
These are what you want your SEO to focus on for this blog. Add up to 5 keywords that you want this blog to rank for and we will use them to help you build your post.
Note: Focus Keywords are not used in SEO directly.
Blog title:
This is the title of your blog, make sure to include your Focus keywords so that it ranks well. This will also rename your blog post.
Meta Description:
This is a short blurb of your post that quickly helps Google and others understand what this post is about. Keep it snappy and make sure to include your Focus Keywords.
SEO Image Descriptions:
These are the individual descriptions for each image. This gets set as the alt text and name for each image when you Publish.
To set an image description, click on any image in the layout and enter a description under the SEO Image Descriptions Tab.
Tip: Turn on the Image Description Overlay to see which images have a description and which do not.
Text Content:
If you have added a text block to your blog you will want to make sure you add enough words. Add around 300 words to your blog to make sure its attractive to Google and interesting for your viewers.

Step 5 - Publishing
Once you have finished building your post it's time to Publish it on your website.
If you wish to add additional features like animation and Pinterest Pins, click on the Publish tab in the top right. Here you will have access to such settings.
Or, click the Publish button in the bottom left and follow the steps to easily get your blog onto your website.
For more detail about posting to your specific site visit the links below:


Step 6 - All done!
Now you should be all done with your post and it should be on your website.
From here you can either edit your post and update it super easily, or create a new one.
If you need a hand with anything else, check out our Help Center
Happy Publishing!

