


8m
Quickstart Tutorial
Learn the basics of Select and get up to speed as soon as possible.
Now you’ve mastered the basics, it’s time to learn about some of Select’s advanced features.
Select detect scenes (a set of very similar images in capture time order). They will load in after the initial project creation and may take a minute or two to appear.
In Loupe and Scenes View you can navigate straight to the first image in the next or previous scene by pressing [left] or [right] (you can change this to up/down in Preferences)
You can cycle through all the images in a single scene by pressing [⌘ up/down] (mac) or [Ctrl up/down] (windows).
You can hold [⌘ shift] (mac) or [Ctrl shift] (windows) and click on a thumbnail – all images in the scene will be selected.
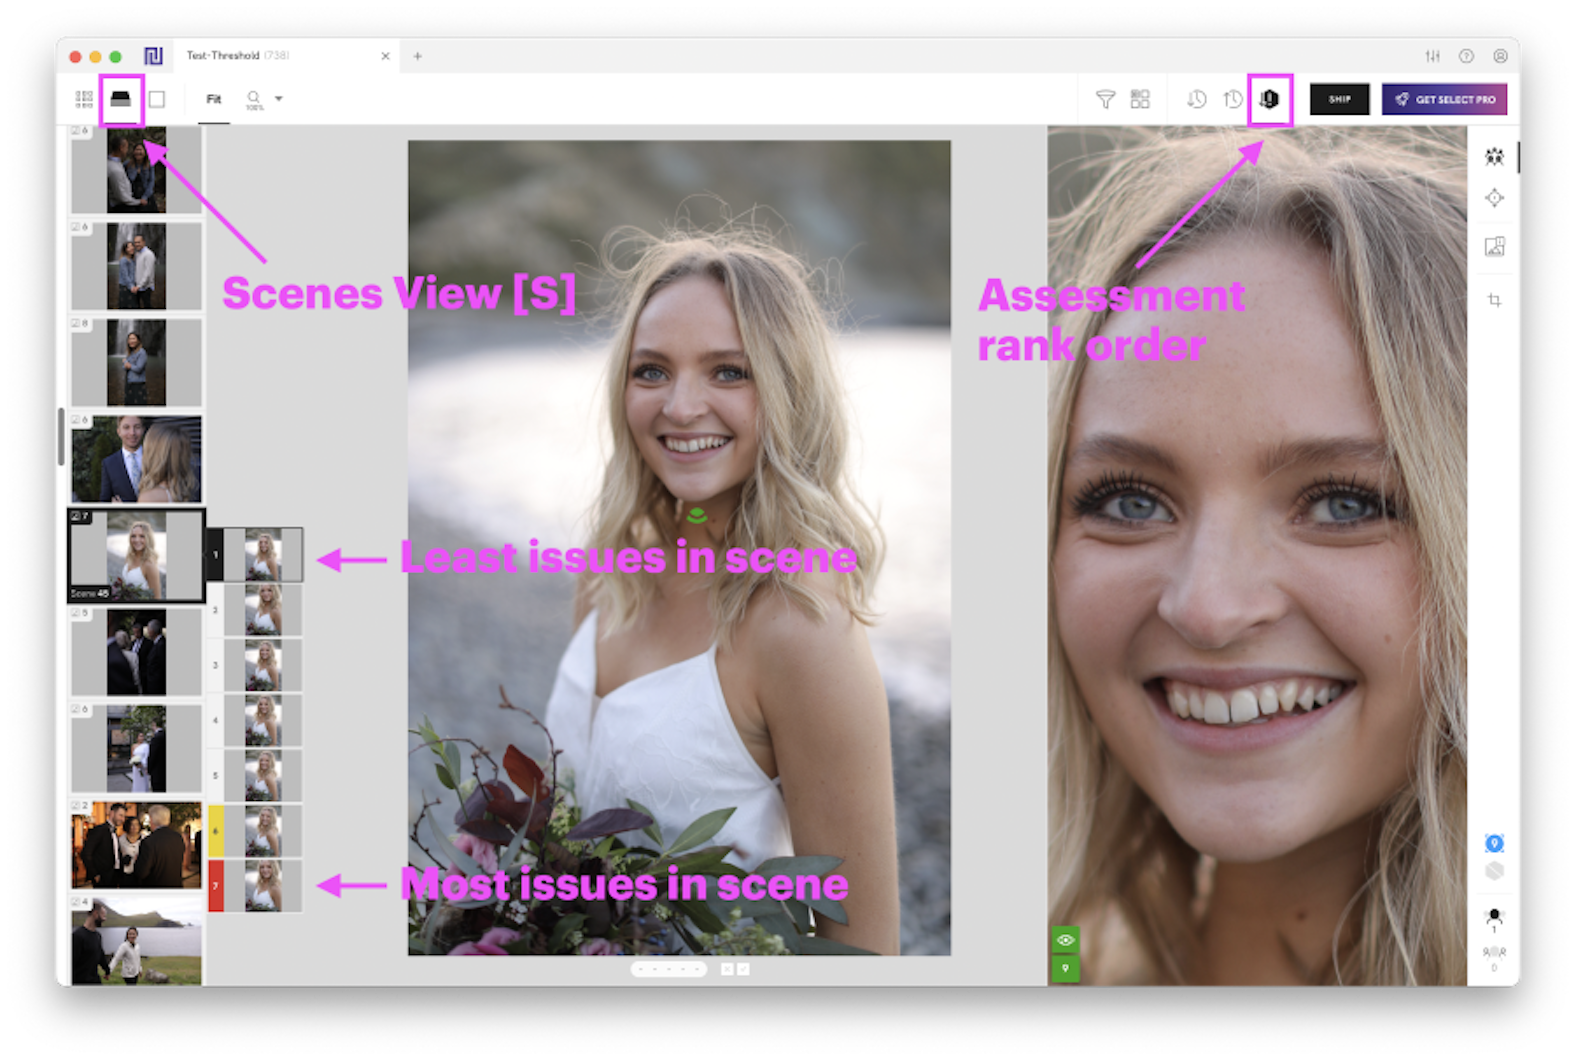
In Scenes View [S], images are grouped into scenes and ordered by capture time. You can also order images within a scene by
Assessment rank. This sorts images within a scene from fewest to most issues found, so you'll see your better ones sooner. Flip to this via the order buttons in the top right of the toolbar when you are in Scenes View.
You might want to change the capture times of your images for various reasons. Maybe you had a second shooter or a second camera and the time was set incorrectly.
If you want to see information about your shot, have a look at the shot info panel.
Open it with [ i ] or via the Workspace menu.
We’ve abbreviated the information shown by default, but you can click the ‘show more’ link to see all the shot information.
You can also rename images and change image capture times from this panel.
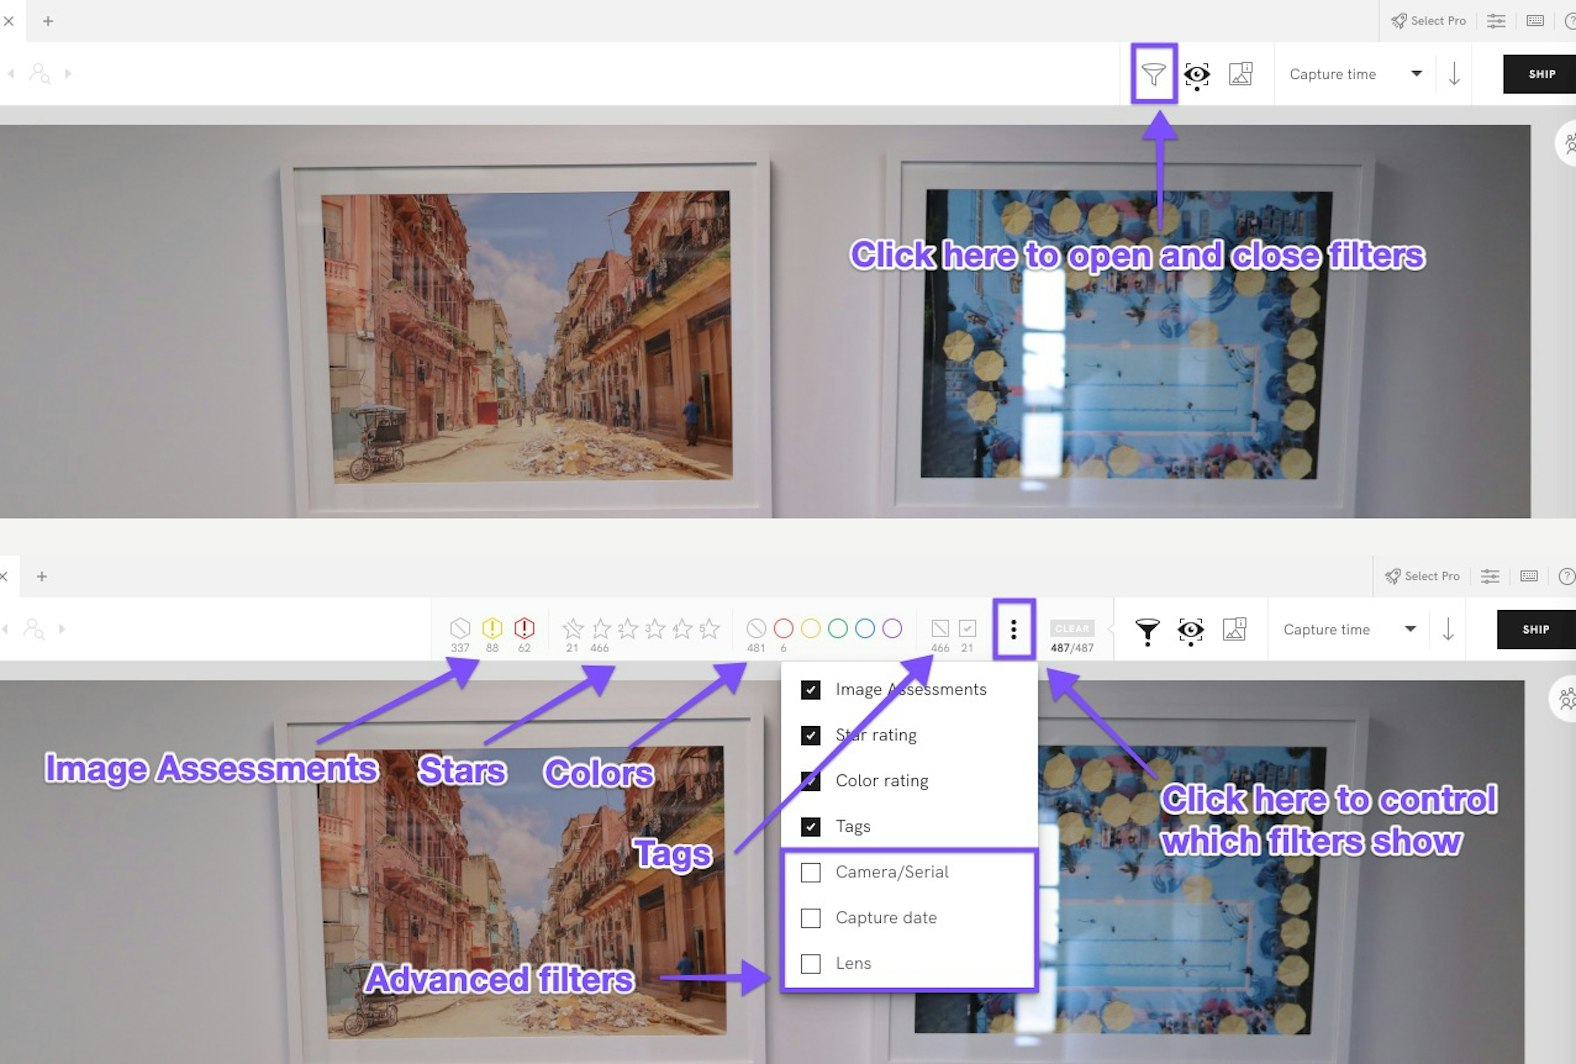
Filters can help you to refine what you do and don’t see in your project.
You can open them by clicking on the filter icon in the toolbar.
The small number below each icon indicates how many images have that rating applied. The small numbers under the clear button show the total number of images in view followed by the total number in the project.
If you hold [⌘] (mac) or [Ctrl] (windows) and click on a filter you can quickly select every other filter except that filter. Useful if, for example, you want to hide any images you applied a red colour filter to.
Advanced filters – to filter your project by the camera, serial number, date and lens – can be found by clicking the 3 dots next to the other filters.
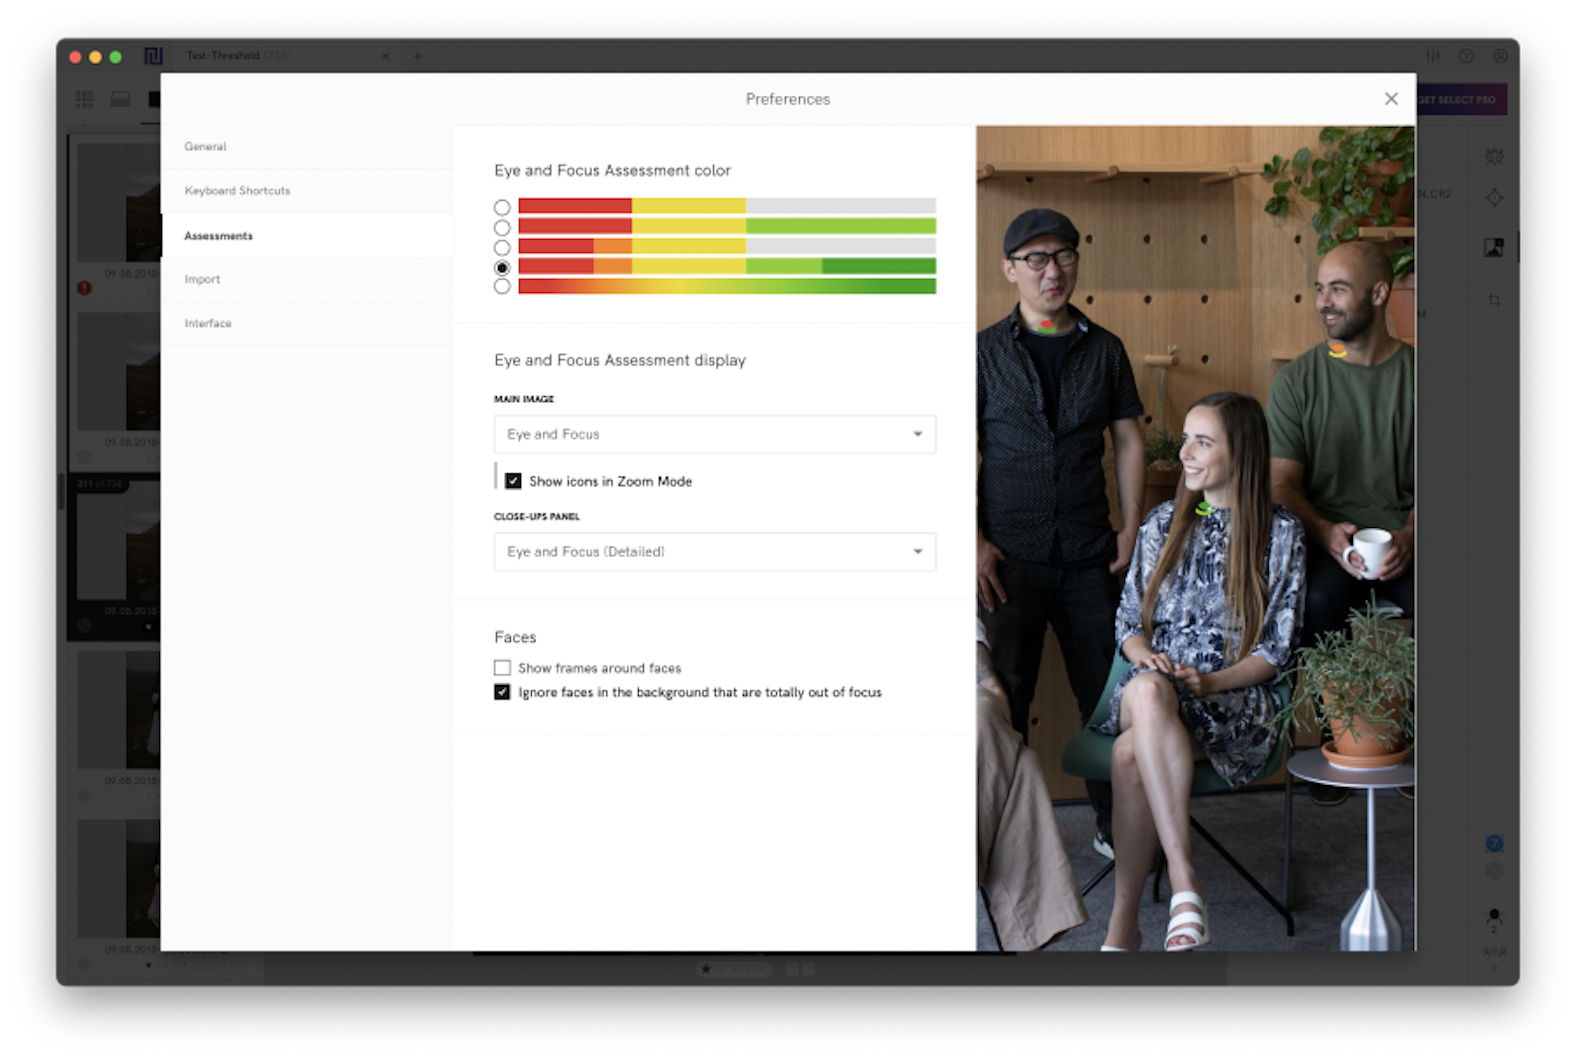
It’s well worth taking a peek into preferences. There are heaps of settings to customise Select to your style. You can open them by clicking the three dots in the toolbar, or from the system menu.