Photo Culling: The Complete FAQ for Photographers


Elli Kim Content
Wednesday, May 27, 2026
Photo culling is the step between capturing images and editing them, where you decide which shots are worth your time. Here is a complete FAQ for photographers to elevate your workflow.
In this article:
The Basics
Culling vs. Editing
Time and Volume
Methods and Workflow
Software and Tools
AI Culling
Tips and Best Practices
Common Mistakes
The Basics
What is photo culling?
Photo culling is the process of reviewing every image from a shoot and selecting only the strongest ones to edit and deliver. It means going through your full take, removing duplicates, blurry shots, closed eyes, poor exposures, and near-identical frames, before any editing begins.
The word comes from agricultural practice. To "cull" a herd means to remove inferior animals from a group. In photography, the same logic applies: you are filtering a large set down to the work worth keeping.
Where does culling sit in the workflow?
Culling happens between capture and editing. You do not start culling after editing. You cull first, then edit only what has been selected. That sequencing matters more than most photographers realize, especially as shoot volumes grow. Every image you eliminate during culling directly reduces the editing work that follows.
Why bother culling at all?
A few reasons:
Editing is the heaviest time investment in post-production. Fewer images to edit means a faster pipeline, full stop.
Delivering too many images overwhelms clients and dilutes the quality of your gallery.
Decision fatigue is real. The longer you spend editing every frame, the worse your creative judgment gets.
Culling before editing keeps your creative focus on the images that actually earned it.
Does culling apply to all types of photography?
Yes. Wedding and portrait photographers cull because they shoot thousands of frames. Sports photographers cull because burst mode generates enormous volume. Landscape and travel photographers cull because they often bracket exposures. Even smartphone photographers benefit from culling. The volume differs, but the discipline is universal.
What makes a photo a "reject" during culling?
Common culling criteria include:
Technical failures
: out of focus, motion blur, severe underexposure or overexposure
Blinks and poor expressions
: closed eyes, unflattering mid-expression moments
Near-duplicates
: when you have 12 frames of the same pose, 11 of them are almost certainly redundant
Misfires
: accidental shutter presses, frames taken while adjusting position
Composition problems
: badly framed shots that a better frame in the same sequence makes irrelevant
Is culling a creative skill or a technical one?
Both. The technical side is relatively mechanical: flag the blurry shot, remove the blink, reject the duplicate. The creative side is harder, and it is where experience matters most. Deciding which of three similar frames best captures the emotion of a moment, or choosing the one image from a sequence that tells the story, requires editorial judgment that no software fully replaces.
Culling vs. Editing
What is the difference between culling and editing?
Culling is selection. Editing is transformation.
Culling is the process of deciding which images are worth working on. Editing is color grading, retouching, exposure adjustment, and processing that happens afterward.
The confusion often comes from photojournalism, where "editing" has historically referred to the selection process. In portrait, wedding, and commercial photography, the terms are used differently: culling is selection, editing is post-processing.
AI Photo Culling vs AI Photo Editing: What's the Difference?
Can I cull and edit at the same time?
You can, but it is not recommended. Mixing the two tasks creates a specific problem: you spend time editing a frame, only to discover two images later that a better shot of the same moment exists. That work is wasted.
Separating the tasks also preserves decision quality. When you are culling, your only job is to decide what stays. When you move to editing, your only job is to make those selected images as good as they can be. Trying to do both simultaneously usually means doing neither well.
Are there cases where editing before culling makes sense?
Sometimes. Concert photography, extreme low-light conditions, or heavily mixed lighting can make it difficult to judge RAW files accurately at the culling stage. In those situations, applying a quick base profile to a representative sample before culling can help you judge the shoot more accurately.
This applies to a small sample, not the full set. The rule remains: cull the full set before editing the full set.
Time and Volume
How long does culling typically take?
For a full-day wedding shoot, culling typically takes around two hours. That compares to an estimated 14 hours of editing for the same shoot, according to Wedissimo's UK Wedding Photography Industry Report. The implication is important: culling is not the time bottleneck, editing is, and a thorough cull directly reduces that editing load.
The two-hour estimate assumes manual culling of a standard wedding take. AI-assisted culling reduces that significantly.
The 4-Hour Wedding Workflow: Cull, Edit, and Deliver Faster in 2026
How many photos does a wedding photographer shoot and deliver?
A typical full-day wedding generates between 2,000 and 3,000 captured frames, with some photographers shooting higher volumes. The average final delivered gallery runs to around 800 images. The ratio from shot to delivered is roughly 3:1 or 4:1 at minimum.
How many images should I deliver per shoot type?
There is no universal answer, but common professional ranges include:
Shoot type | Typical delivered count |
Full-day wedding | 400 to 800 images |
Engagement session | 50 to 100 images |
Portrait session (1 hour) | 25 to 50 images |
Corporate headshots (per subject) | 3 to 5 images |
Sports event | Varies significantly by format |
The guiding principle is quality over quantity. Delivering 150 adequate images serves clients less well than delivering 50 strong ones.
Does culling affect my hourly rate as a photographer?
Yes, significantly. Editing time is the largest post-production cost in a photography business, measured in hours. A photographer who delivers 150 images from a portrait session has spent roughly five times as long editing as one who delivers 30. If your hourly rate is to make business sense, tightening your cull is one of the most direct levers you have.
Methods and Workflow
What is the difference between "culling in" and "culling out"?
These are two philosophically different approaches to the same process.
Culling out (subtractive): You start with everything and progressively reject what does not meet your standards. This is the more common default approach.
Culling in (additive): You start from nothing and actively select only the frames that earn their place in the final gallery. Some photographers find this faster and more decisive.
If you are consistently rejecting more than half your images, culling in tends to be less work, because you are making fewer total decisions.
What does a multi-pass culling workflow look like?
Most professional workflows use at least two passes:
Pass 1 (the fast pass): Go through everything quickly. Reject obvious failures, blurs, and blinks. Flag or star images you want to keep reviewing. Speed matters here. Do not agonize.
Pass 2 (the selection pass): Work through your flagged images and make the harder decisions. Choose the best frame from each group of near-duplicates. Get ruthless about redundancy.
Pass 3 (optional refine pass): Review your final selects. Ask whether you have too many. Trim where you can.
What rating or flagging systems do photographers use?
Common approaches in Lightroom Classic:
Pick/reject flags
(P to pick, X to reject): The simplest system and often the fastest.
Star ratings
: Useful for multi-tier ranking, but slower because more options mean more decisions per image.
Color labels
: Often used as a secondary layer on top of flags or stars.
The most efficient cullers tend to use the simplest possible system. If you need more than two or three states during culling, you may be doing editorial work that belongs to a later stage.
Should I cull on the same day I shoot?
There is a reasonable argument for it. Culling while the shoot is fresh means you remember the story: which moments mattered, which poses felt flat, what the client responded to. That context helps with the harder editorial decisions.
The counterargument is fatigue. Culling requires clear judgment, and culling after a ten-hour wedding day is not ideal. Many photographers cull the next morning as a compromise.
Should I delete rejected images immediately?
Not right away. Keep rejected images in a separate folder until the project is delivered and signed off. Storage is cheap, and occasionally a client asks about a moment you rejected. Once the project is fully closed, you can archive or delete.
Photo Culling for Beginners: A Step-by-Step Checklist for Your First Shoots
Software and Tools
What software do photographers use to cull?
The main categories:
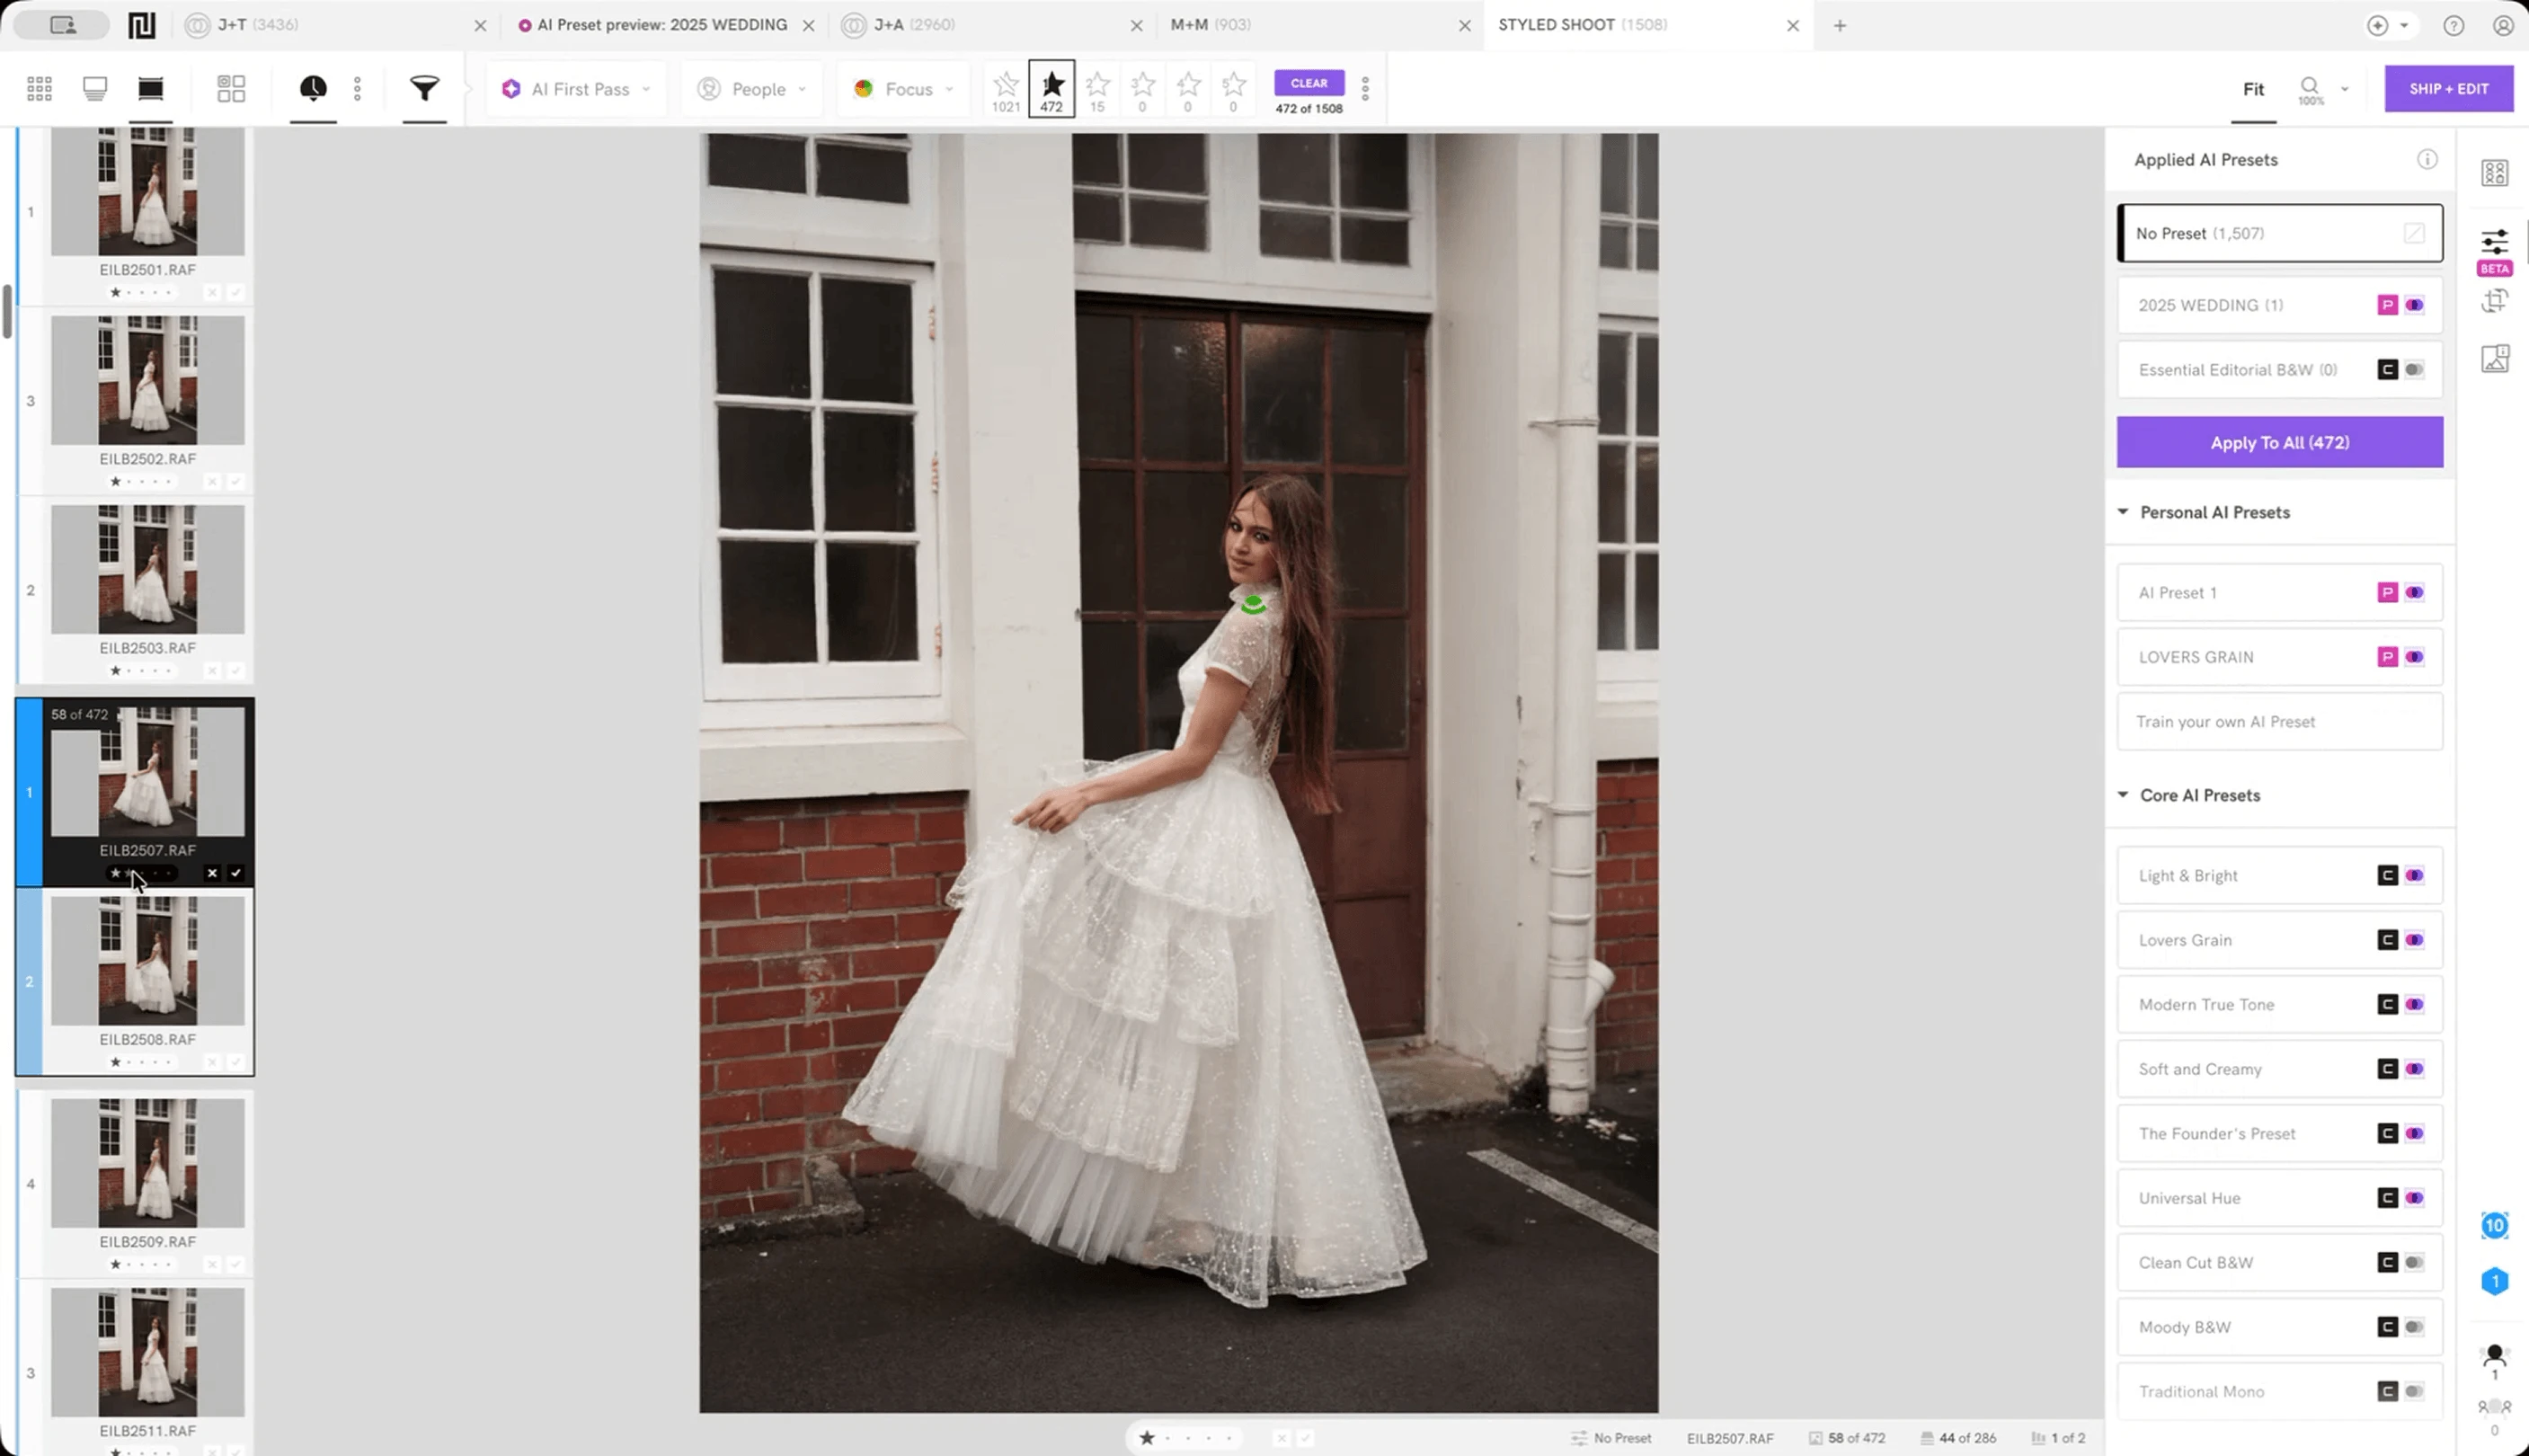
AI-assisted culling tools:
Narrative
: AI-assisted culling with adjustable aggression thresholds, designed for photographers who want AI assistance without surrendering creative control. Local processing, offline, integrates with Lightroom.
Narrative Review (2026): Is It the Best AI Photo Culling Software?
AI-automated culling tools:
Aftershoot
: Local AI processing with automated blink, blur, and duplicate detection.
FilterPixel
: Cloud-based, positioned for speed across high-volume shoots.
Manual culling tools:
Photo Mechanic
: The longstanding benchmark for manual culling speed among professionals, particularly photojournalists. It reads the JPEG preview embedded in RAW files rather than decoding the full RAW, which means images load almost instantly. No AI features. One-time license.
Editing tools with culling features:
Imagen
: Cloud-based, combines culling and editing in an integrated workflow.
Lightroom Classic
: Built primarily for editing, but widely used for culling because photographers are already in it. Slower than Photo Mechanic for culling at volume, particularly on large catalogs.Capture One
: Strong manual culling capabilities alongside color grading tools. Common among studio and commercial photographers.
AI Photo Culling Software: How It Works (And Why Photographers Are Switching in 2026)
Why is Lightroom slower for culling than dedicated tools?
Lightroom was built primarily as an editing and cataloging environment. When culling at volume, it must render 1:1 previews for RAW files, which can take five to twelve minutes per thousand images on a modern machine. Photo Mechanic sidesteps this by reading the embedded JPEG previews that most cameras write into every RAW file, making images available almost immediately.
For photographers who cull 1,000 to 3,000 images at a time, that rendering lag compounds into a meaningful time difference.
Is Photo Mechanic still relevant in 2026?
For manual culling speed and photojournalism workflows, yes. Nothing has surpassed it for raw ingestion speed, metadata tagging, and deadline-driven workflows. Its limitation is that it offers no AI capabilities, which means every selection decision remains manual. For photographers doing high-volume event or wedding work, AI culling tools now process the same images faster than even the most experienced Photo Mechanic user can manually review them.
Photo Mechanic vs Narrative: Which Is Better for Fast, Intelligent Culling?
Do I need dedicated culling software, or can I use Lightroom?
You can use Lightroom and many professionals do. The case for a dedicated tool comes down to volume and time. If you are regularly working through 2,000-plus images per shoot, the speed difference between Lightroom and a dedicated culling tool is meaningful in both time saved and decision fatigue avoided.
Adobe shipped an Assisted Culling feature in Lightroom Classic in late 2025, which flags technical issues automatically. It is described as conservative in its selections but represents a meaningful addition to Lightroom's culling capabilities for photographers already in that ecosystem.
AI Culling
What is AI photo culling?
AI photo culling uses machine learning models trained on large sets of professionally curated images to automatically evaluate and rank photos based on technical quality. The AI assesses sharpness, exposure, focus accuracy, eye openness, facial expression quality, and duplicate grouping, and sorts images accordingly before you begin manual review.
The result is that a set of 1,000 images that would take an experienced photographer one to two hours to manually cull can be pre-sorted to a manageable shortlist in minutes.
What does AI culling actually detect?
Depending on the tool, AI culling can identify:
Out-of-focus frames and motion blur
Closed eyes, partial blinks, and poor expressions
Near-duplicate frames (grouping burst sequences and selecting the strongest candidate)
Exposure failures
Subject positioning and framing issues
In portrait and wedding work, relative sharpness across faces in group shots
Does AI culling replace the photographer's judgment?
No, and the tools that work well are designed not to. AI handles the technical triage reliably. It does not handle the editorial and emotional dimensions: which candid moment carries the most feeling, whether a motion-blurred dance floor shot is an intentional artistic choice or a misfire, or which of three technically identical frames best tells the story.
Most professional workflows use AI for the first pass, then apply photographer judgment to the remaining selects. That division of labor, AI doing the mechanical work and the photographer doing the editorial work, is where the combination is most effective.
Is AI culling accurate?
For technical flaws, accuracy is high. Blur detection, blink detection, and exposure flagging are well-solved problems for modern AI culling systems. Where accuracy varies more is in context-dependent decisions: understanding that a closed eye during a first kiss is not the same kind of problem as a blink in a posed group shot requires contextual understanding that some tools handle better than others.
What does "local" vs. "cloud" processing mean for AI culling?
Local processing means the AI runs on your machine. Your RAW files never leave your hard drive. This matters for photographers working with sensitive client material, those in locations with slow internet, or those concerned about data privacy.
Cloud processing means your images are uploaded to a server for AI analysis, then results are returned. It typically requires less computing power from your own machine, but upload time becomes a variable. For photographers with large RAW files and slower internet connections, this can be a practical constraint.
Can I control how aggressive AI culling is?
In better tools, yes. Most AI culling platforms let you set parameters for how aggressively the AI flags and rejects images. A more aggressive setting removes more images automatically; a more conservative setting leaves more for human review. The right setting depends on the shoot type, your personal style, and how much trust you extend to the AI's initial assessment.
Tips and Best Practices
What is the single most important habit for faster culling?
Use keyboard shortcuts, not a mouse. Clicking flag icons or dragging star rating sliders costs one to two seconds per image. Across 2,000 images, that adds up to an hour of wasted motion. Every major culling tool supports keyboard-driven workflows, and building that muscle memory is the single highest-return habit change available.
What is the right mindset for culling?
Decisive. The photographers who cull fastest have internalized one rule: pick the first frame that clearly works and move on. Deliberation over similar frames rarely improves your selection. It mostly burns time and erodes decision quality.
The goal during culling is not to find the perfect image. It is to identify images that are clearly worth editing, and to do so quickly enough that you are not mentally depleted before the editing stage begins.
Should I cull to music or in silence?
This is personal, but many experienced photographers recommend silence or low-key ambient sound for culling. Music with lyrics can distract from emotional assessment, particularly in portrait and wedding work where you are reading facial expressions.
How do I avoid over-attaching to images I should reject?
This is one of the most common culling problems, especially early in a career. A few practical approaches:
Do a full first pass without stopping. Do not edit anything before the first pass is complete.
Compare images against each other, not against an ideal in your head.
Give yourself permission to revisit close calls, but set a limit. One revisit, maximum.
When in doubt between two similar frames, pick one and move on. The difference rarely matters to the client.
What is the benefit of culling immediately after a shoot vs. waiting?
Culling while the session is fresh means you have context: you remember which poses connected, which moments were technically compromised by conditions on the day, what the shoot was meant to accomplish. That context speeds up the harder decisions.
The risk is fatigue. Many photographers find a short break, ideally overnight, allows them to approach culling more objectively.
Common Mistakes
Delivering too many images
The most widespread culling problem. Giving clients a hundred nearly identical frames is not generosity; it is decision-making they should not have to do. Your job as the photographer is to do that work on their behalf.
Using Lightroom as a primary culling tool when working at volume
Lightroom works. It is also slow compared to dedicated culling tools, particularly on large catalogs with 1:1 previews being rendered. Photographers working through thousands of images regularly are likely losing meaningful time by culling in Lightroom.
Editing before culling
Editing a frame, then discovering a better version of the same moment, is wasted work. Cull the full set before opening your editing tools.
Over-complicating the rating system
Five-star systems with color labels and pick flags give you dozens of possible states per image. The combinatorial complexity slows decision-making without producing better outcomes. For most culling workflows, two states are enough: keep or discard on pass one, select or hold on pass two.
Trusting AI automation on emotionally complex material without review
AI culling is reliable on technical quality. It is less reliable on the editorial question of whether a technically imperfect frame carries an irreplaceable moment. Always build in a review pass after automated culling, especially for wedding and documentary work where emotion matters more than technical precision.
Culling while tired
Decision quality degrades meaningfully after sustained focus. Research cited in the photography industry suggests culling accuracy can drop significantly after two hours of sustained manual review. If you are in hour three of culling and still undecided about the same four frames, stop. The decisions will be better after a break.
This document reflects current professional practice and available tooling as of 2026. Software features and pricing change; verify specifics with individual vendors before making purchasing decisions.
Content